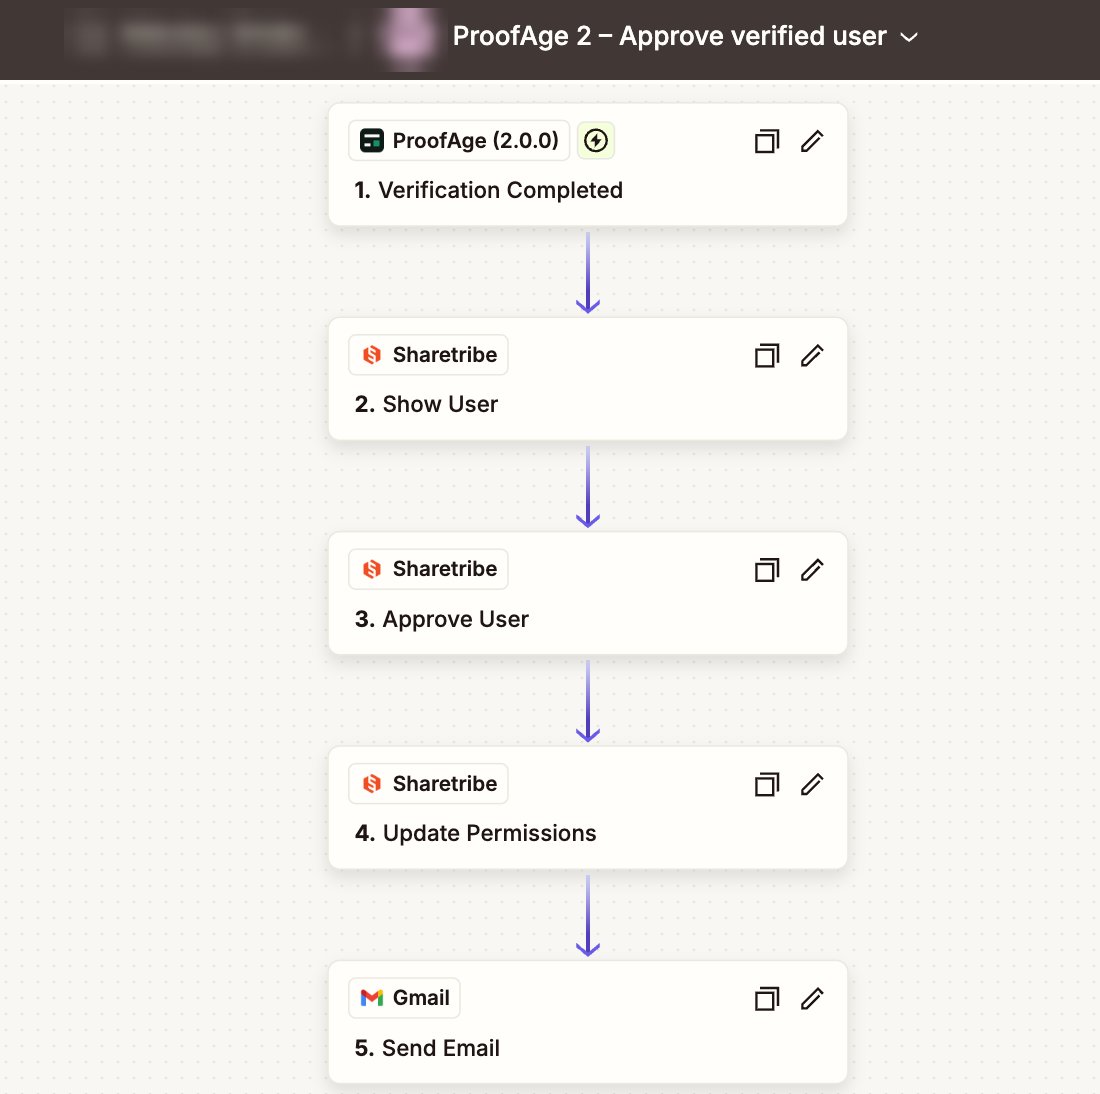
- ProofAge 2 – Approve verified user: when a verification is approved, approve the user and/or grant permissions, and tell them by email.
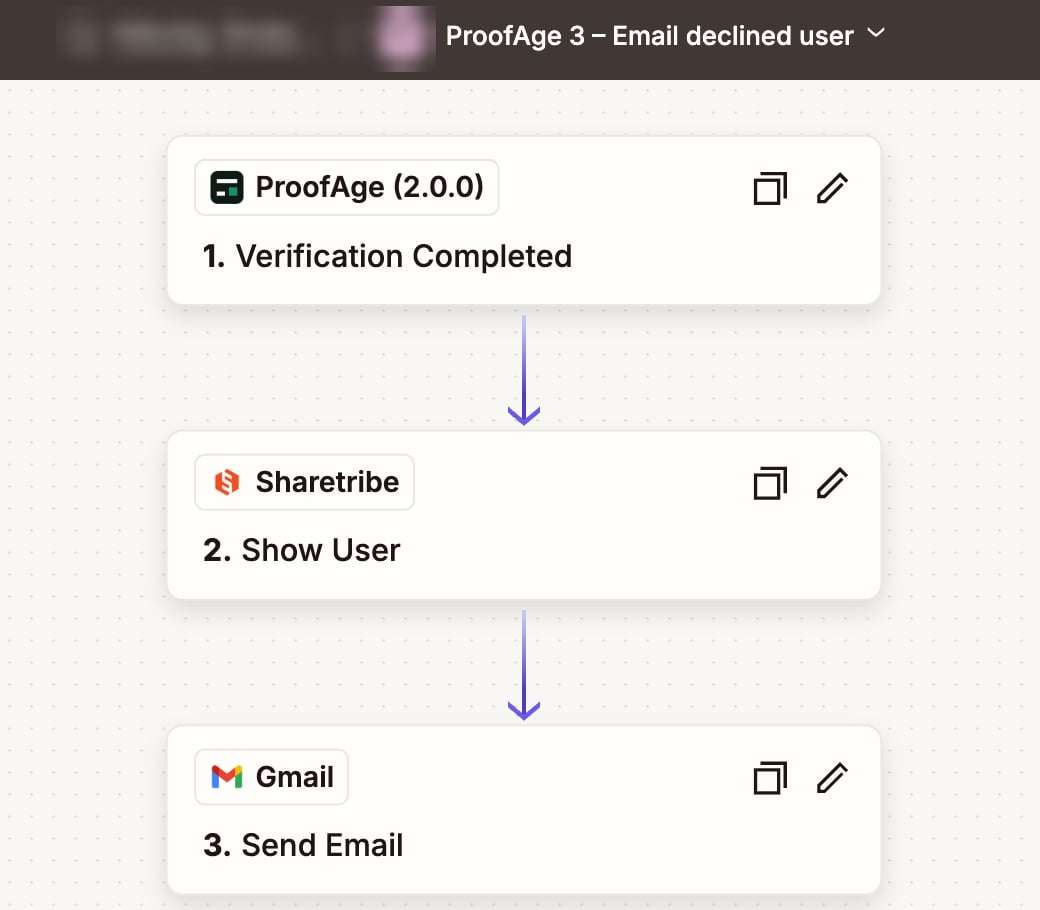
- ProofAge 3 – Email declined user: when a verification is declined, tell the user and link your “verification failed” page.
What you need
- Everything from Send the verification link, with the first Zap turned on.
- A finished test verification. Use the test user from the first page: open the link in their verification email and go through the screens. In a test workspace nothing is analysed, so any ID document works. If you already used that link, sign up a new test user and wait for their email.
- Your Sharetribe and ProofAge connections in Zapier from the first page.
Choose the result of a test verification
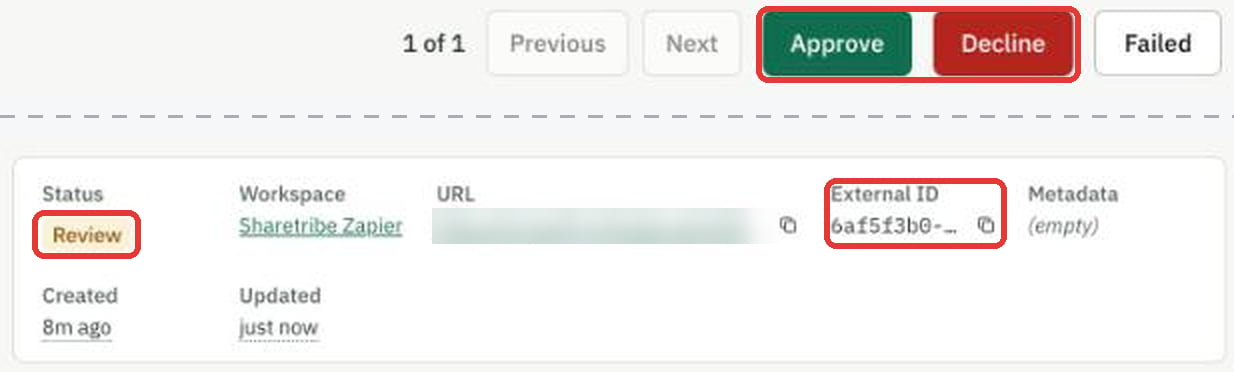
In a test workspace ProofAge never decides on its own. Every finished verification waits with the status Review until you choose its result. Do this once now, so the trigger in the next section has a result to find:- In Sharetribe Console, copy your test user’s ID: go to Users, click the user and copy the User ID.
- In the ProofAge console, open Verifications and paste the ID into the search box. The verification shows up with the result In review. The External ID column holds the Sharetribe user ID.
- Click the verification to open it.
- Click Approve at the top right. It takes effect right away, without a confirmation.
Creating Zap 2, step by step
In Zapier, click + Create, choose Zaps and name the new Zap ProofAge 2 – Approve verified user.Step 1: Verification approved trigger
- As the trigger app, choose ProofAge. As the trigger event, choose Verification Completed.
- Choose your ProofAge connection, “Your workspace name (Test)”.
- In Configure:
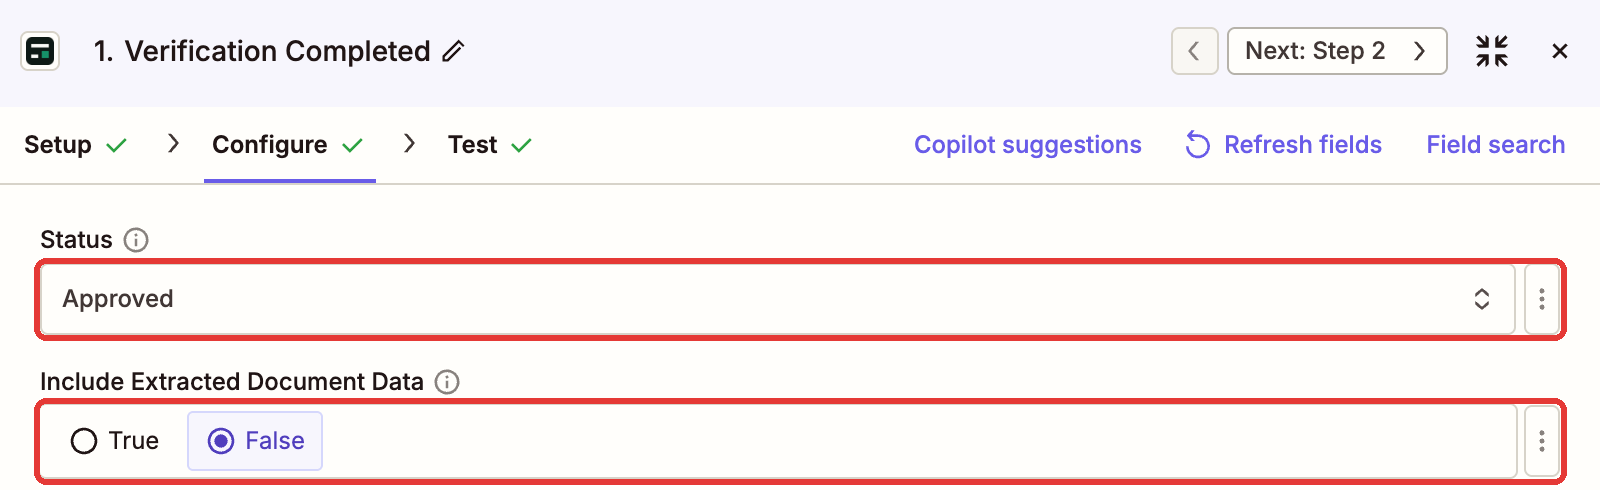
- Status: Approved. The Zap then runs only for approved verifications, so you don’t need a separate Filter step for this.
- Include Extracted Document Data: leave it False. Zapier then receives only the result and your user’s ID, never their name, birth date or document number.
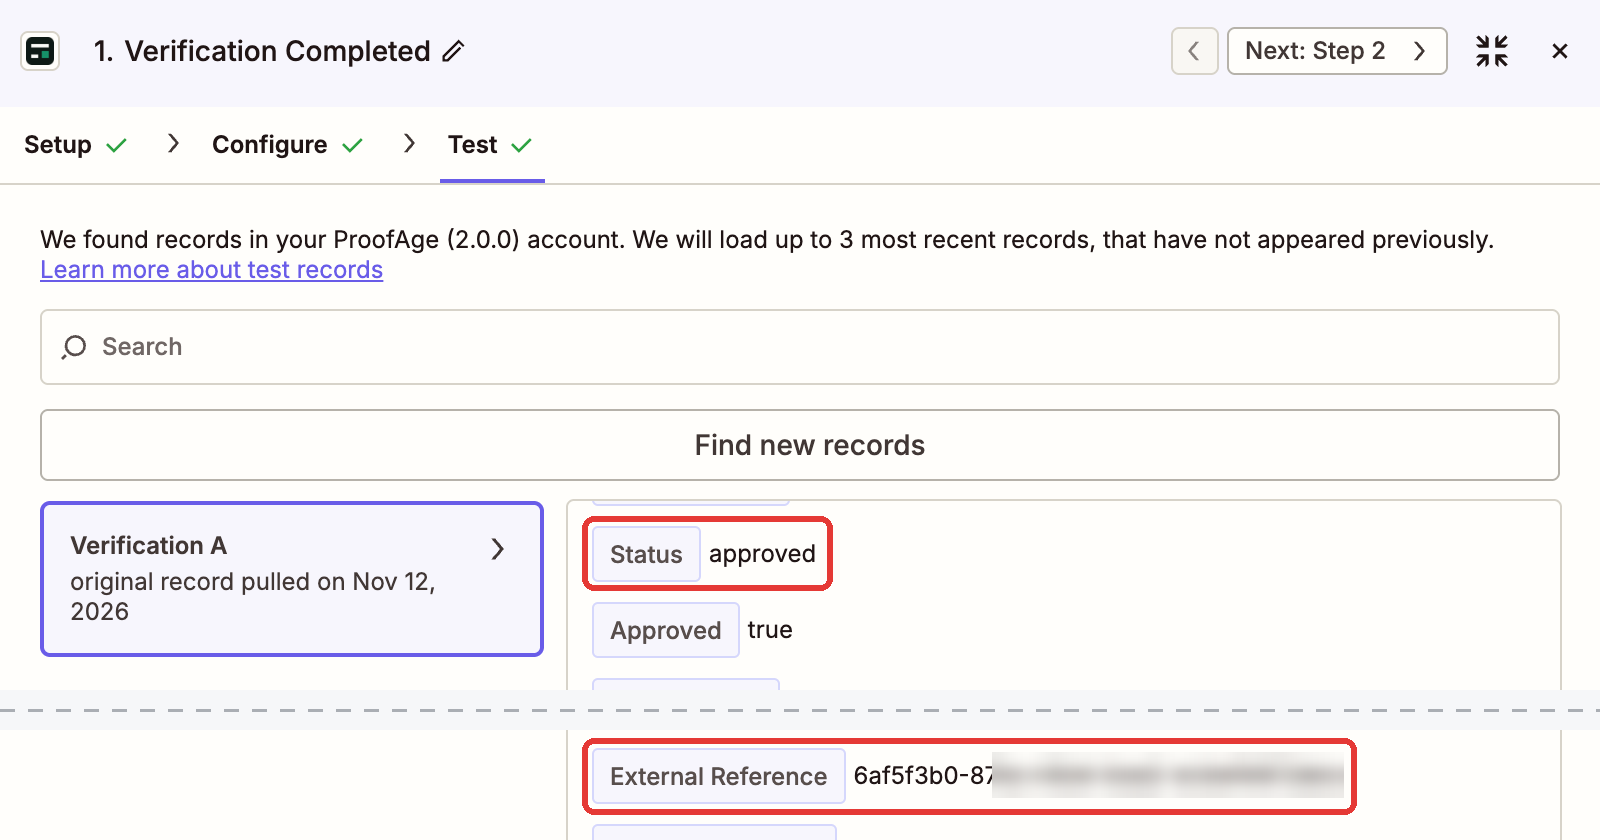
- Click Test trigger and pick the verification you approved. Check that External Reference contains a Sharetribe user ID.
Step 2: Look up the user in Sharetribe
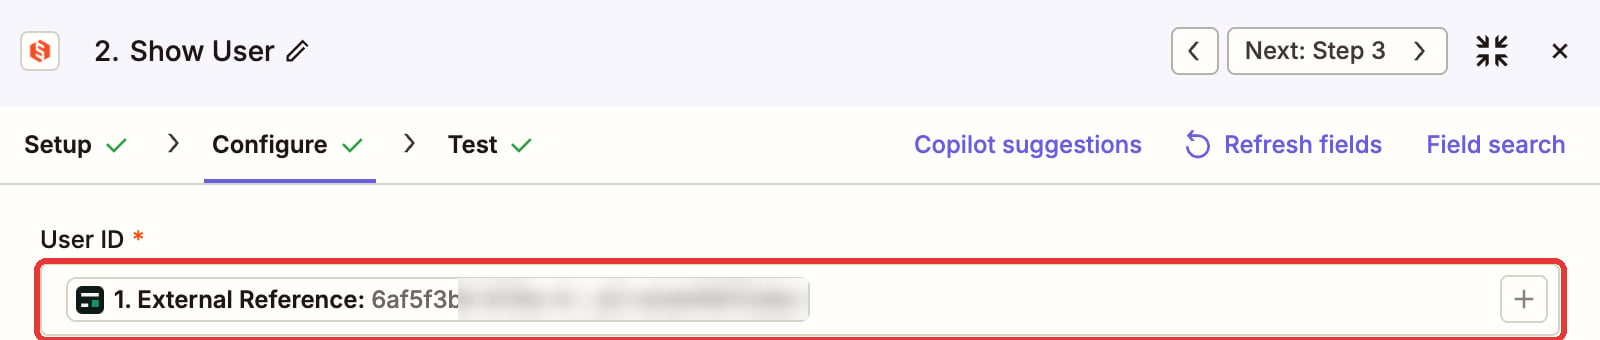
- Add an action step with Sharetribe and choose Show User.
- Choose your Sharetribe connection. Check that it’s the Test environment.
- User ID: choose External Reference from step 1.
- Leave the other fields as they are and click Test step. You should see your test user, including their email address and name.
Step 3: Approve the user
Use this step only if new users need approval to join your marketplace (Approve users who want to join in Access control). Approve User only works on users who are pending approval. If your marketplace doesn’t require approval to join, skip this step and use step 4 only. Before the step runs, the user looks like this in Sharetribe Console, under Users: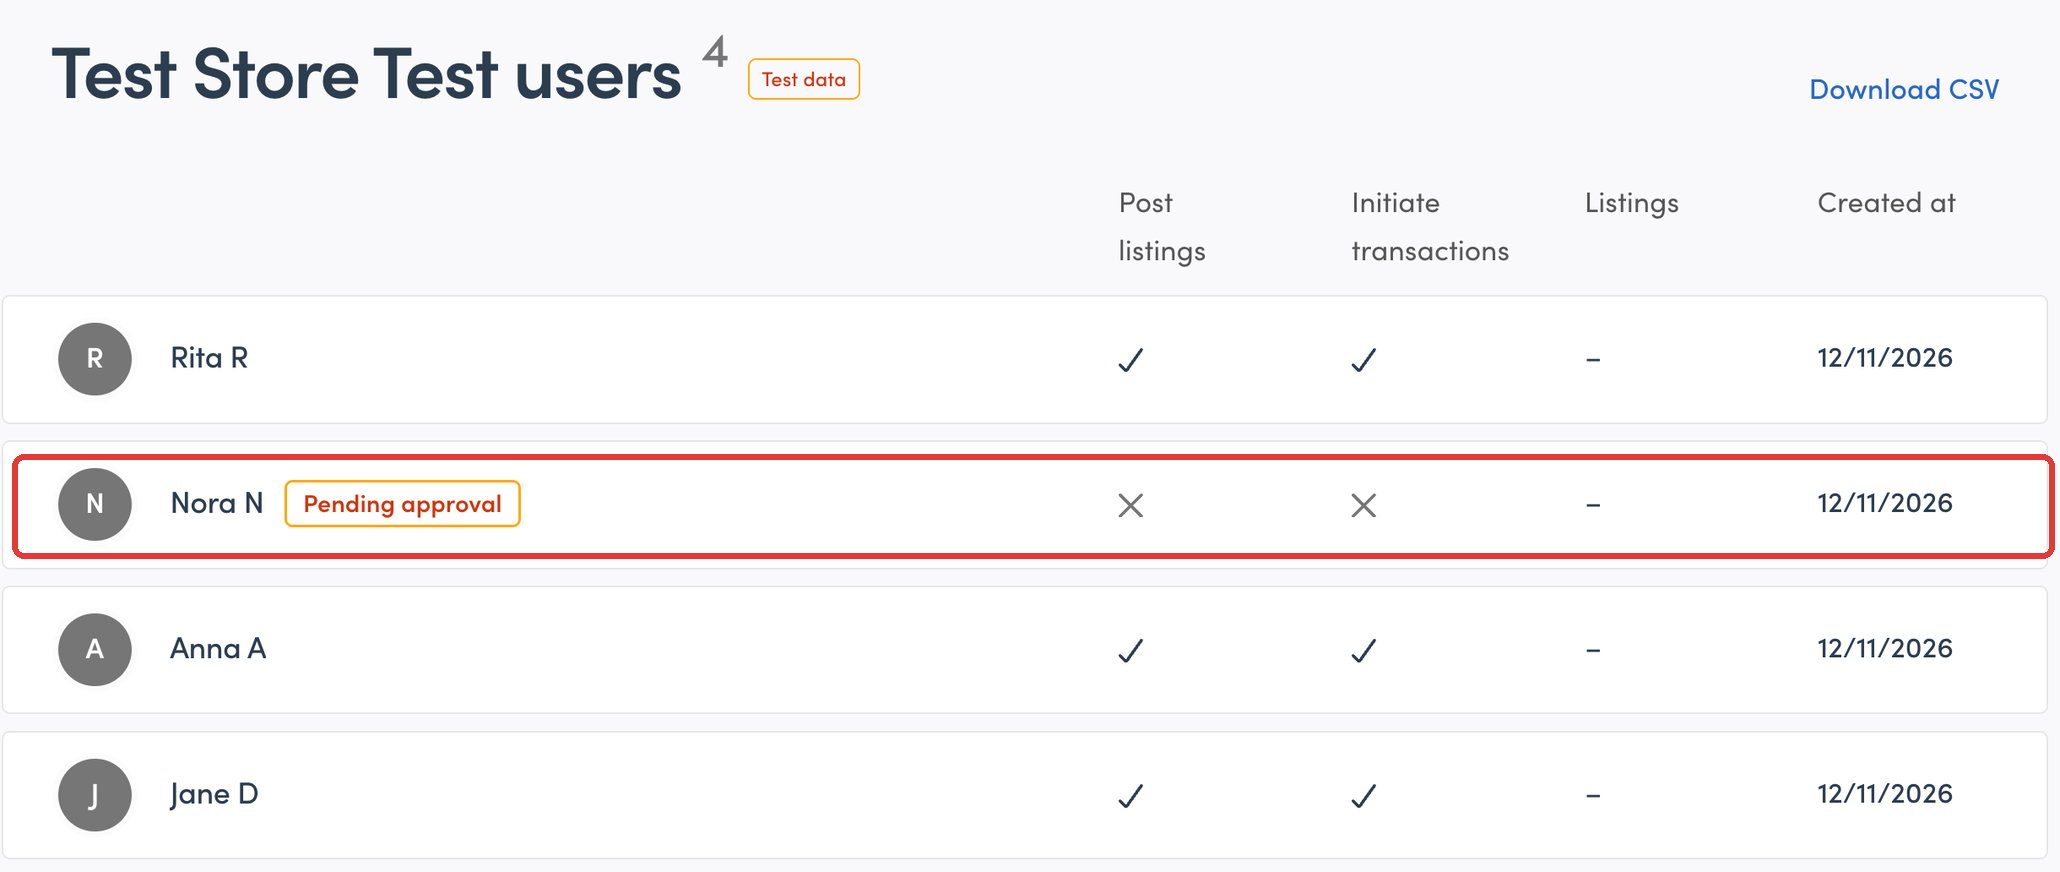
- Add an action step with Sharetribe and choose Approve User.
- User ID: choose External Reference from step 1.
-
Click Test step. The Test tab gets a tick, and Data out shows the user’s ID.
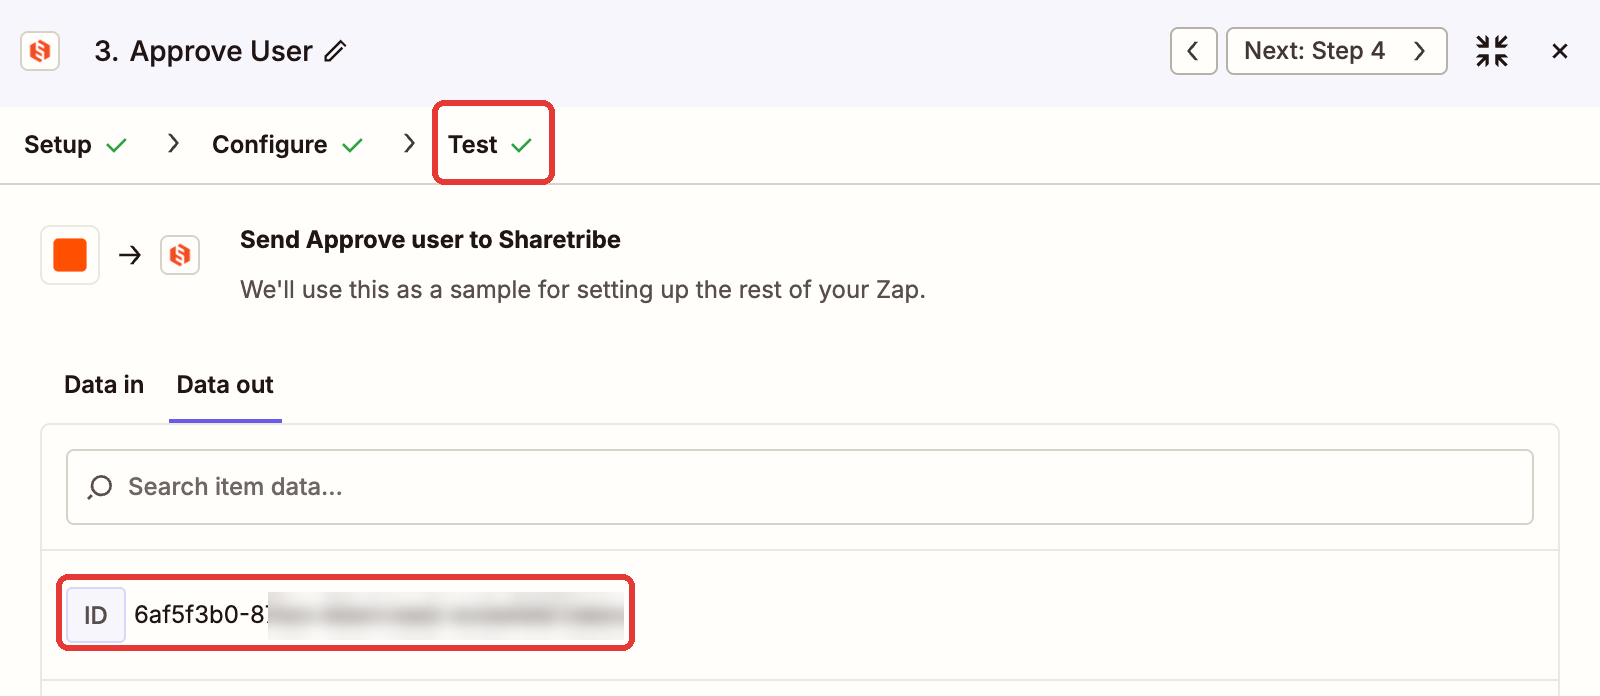
pendingApprovaltoactive).Testing this step really approves your test user. To test the Zap again later, sign up a new test user.
Step 4: Grant permissions
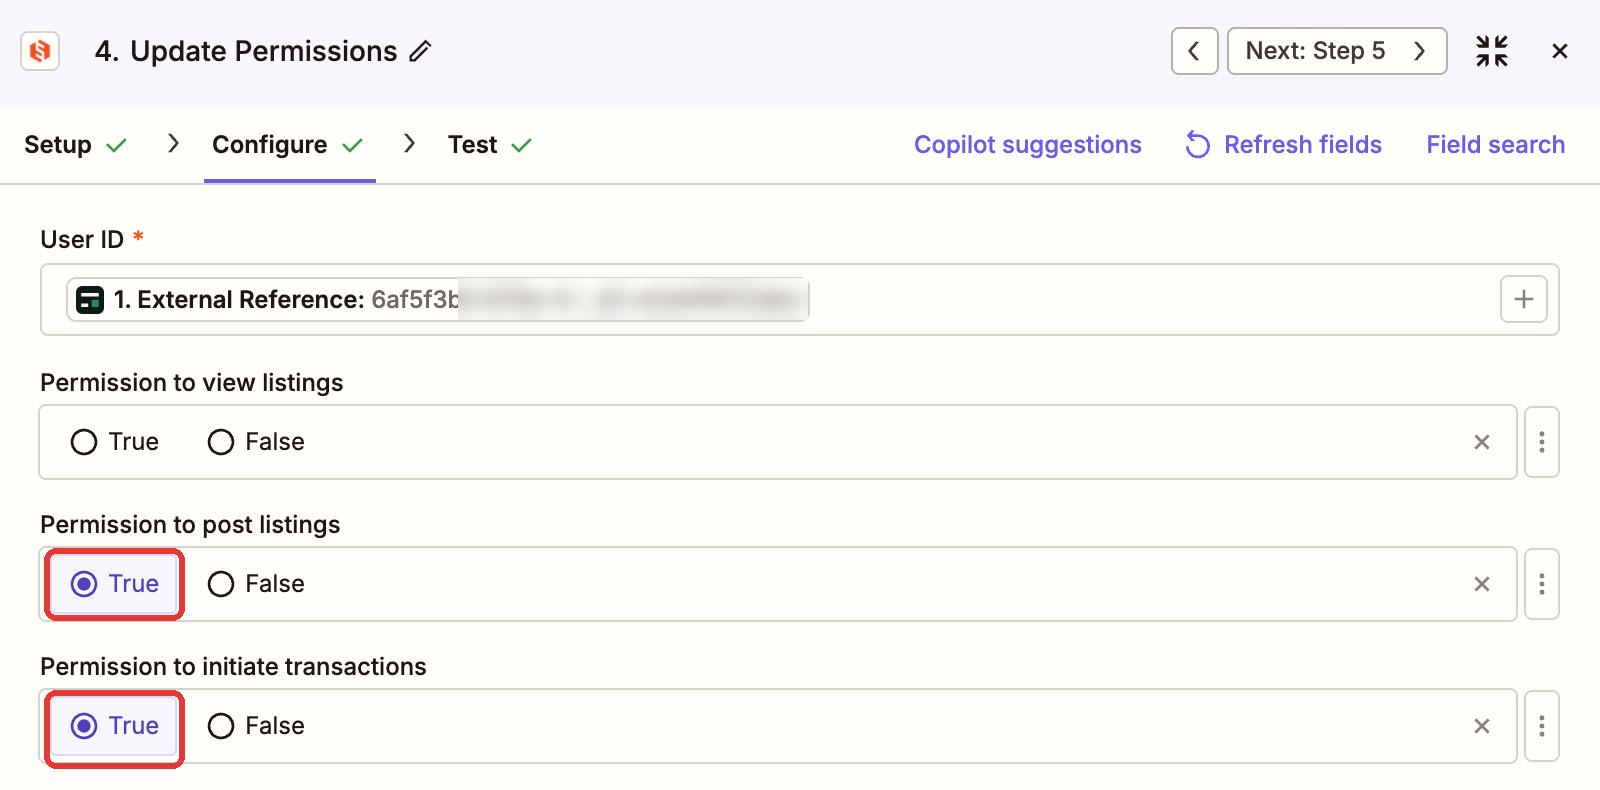
Use this step if you restricted posting listings or starting transactions in Access control.- Add an action step with Sharetribe and choose Update Permissions.
- User ID: choose External Reference from step 1.
- Set Permission to post listings and Permission to initiate transactions to True. Leave Permission to view listings empty unless you restricted viewing.
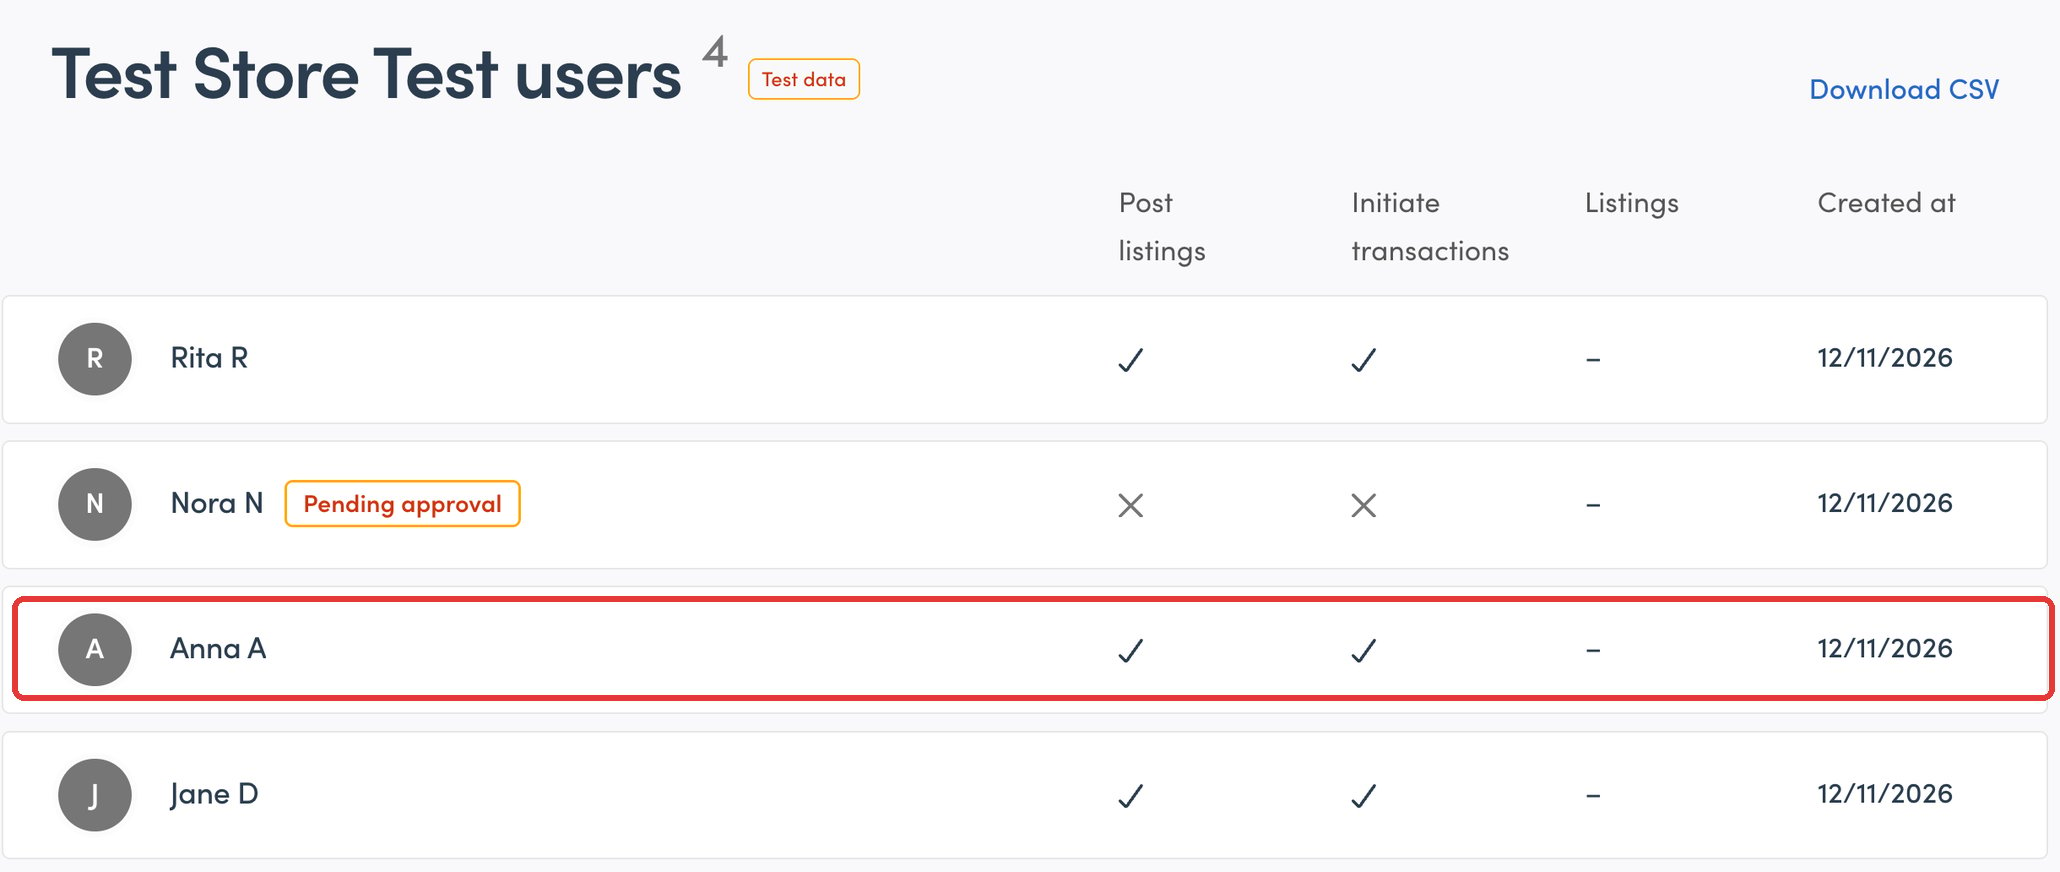
- Click Test step. In Sharetribe Console, under Users, the Post listings and Initiate transactions columns now show a tick for the test user.
Step 5: Tell the user they’re verified
- Add an action step with Gmail and choose Send Email.
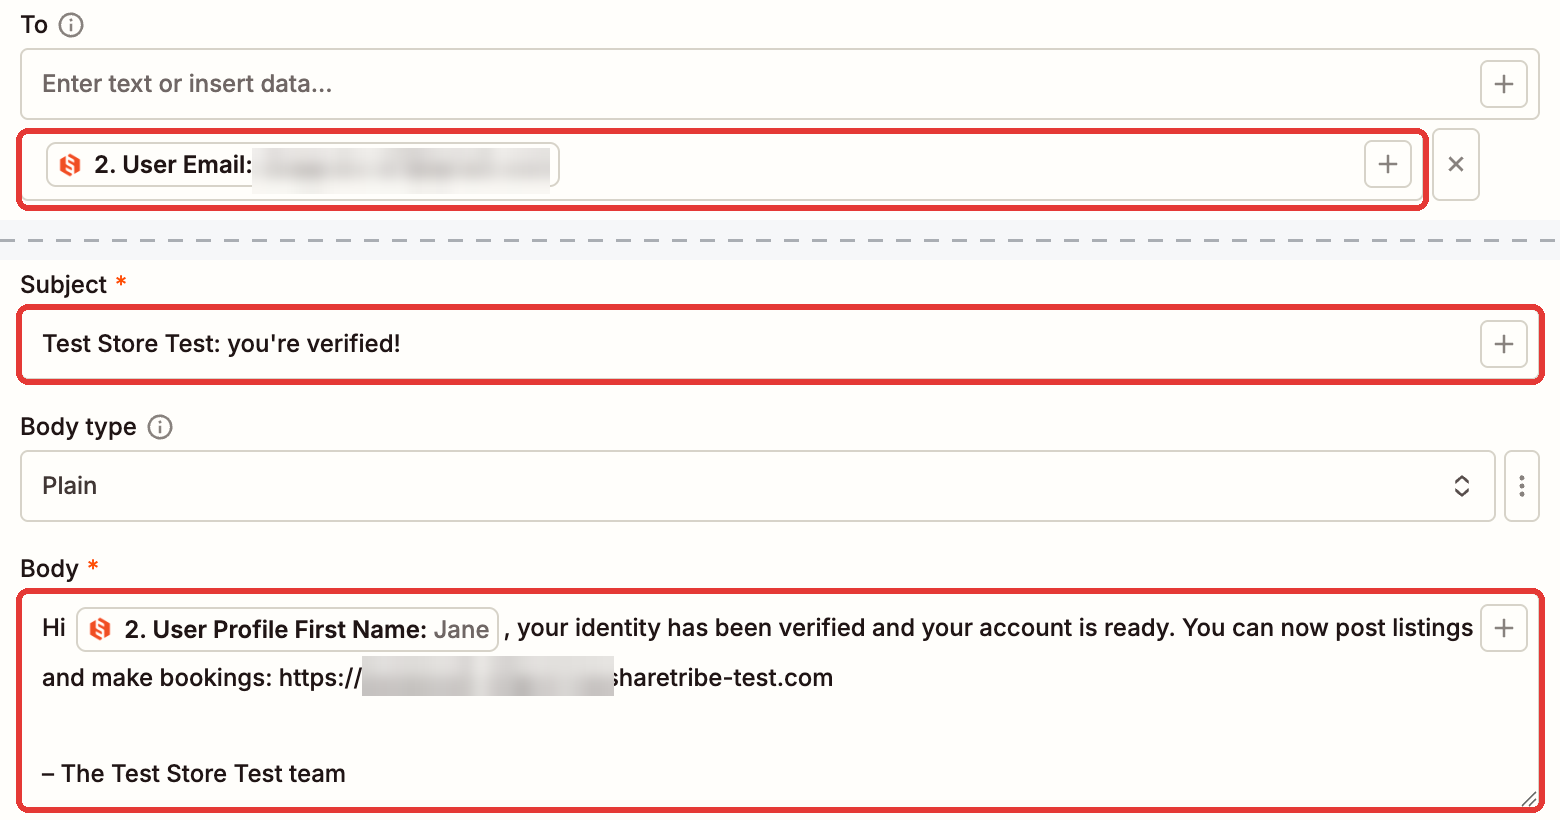
- To: click + and choose User Email from step 2 (Show User).
-
Subject: for example
Your Marketplace: you're verified! -
Body: for example:
Hi [2. User Profile First Name], your identity has been verified and your account is ready. You can now post listings and make bookings: https://your-marketplace.com – The Your Marketplace team
- Click Test step and check that the email arrives in the test user’s inbox.
- Click Publish to turn the Zap on.
Creating Zap 3: email users whose verification was declined
Zap 3 is a shorter copy of Zap 2, so you don’t build it from scratch.- On your Zaps page, open the ⋮ menu of ProofAge 2 – Approve verified user, choose Duplicate, then Duplicate and edit. The copy opens as “(Copy) ProofAge 2 – Approve verified user”.
- Click the copy’s name, choose Rename and name it ProofAge 3 – Email declined user.
- Delete Update Permissions and Approve User: open each step’s ⋮ menu, choose Delete and click again on Really delete?. Keep Show User and the email step.
-
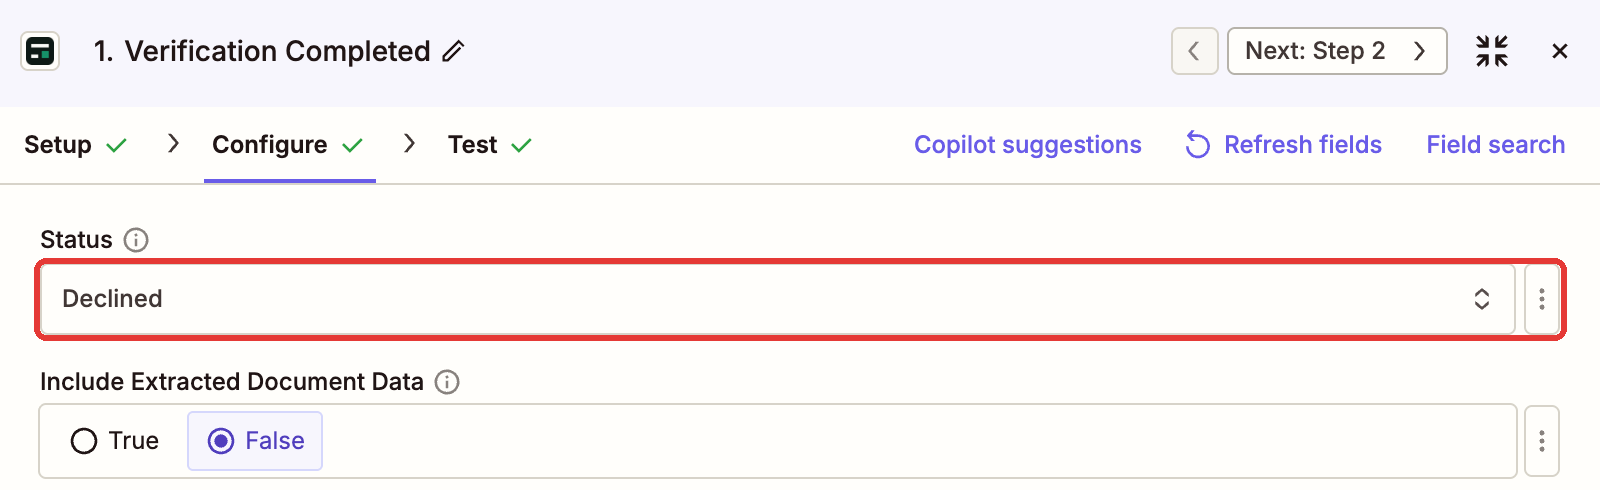
Open the trigger and change Status to Declined.
-
Open the email step. Change the Subject, for example
Your Marketplace: we couldn't verify your identity, and the Body, for example:Hi [2. User Profile First Name], unfortunately we couldn’t verify your identity. You can read what to do next here: https://your-marketplace.com/p/verification-failed If you think this is a mistake, reply to this email and we’ll send you a new link.
-
Give the trigger a declined verification to test with. Zapier won’t publish the copy without
one.
- Sign up another test user and finish their verification.
- In the ProofAge console, open that verification and click Decline.
- In Zapier, open the trigger’s Test tab, click Find new records and pick the new
record. Its Status is
declined.
- Test the email step and check that the email arrives.
- Click Publish.
Test the whole flow
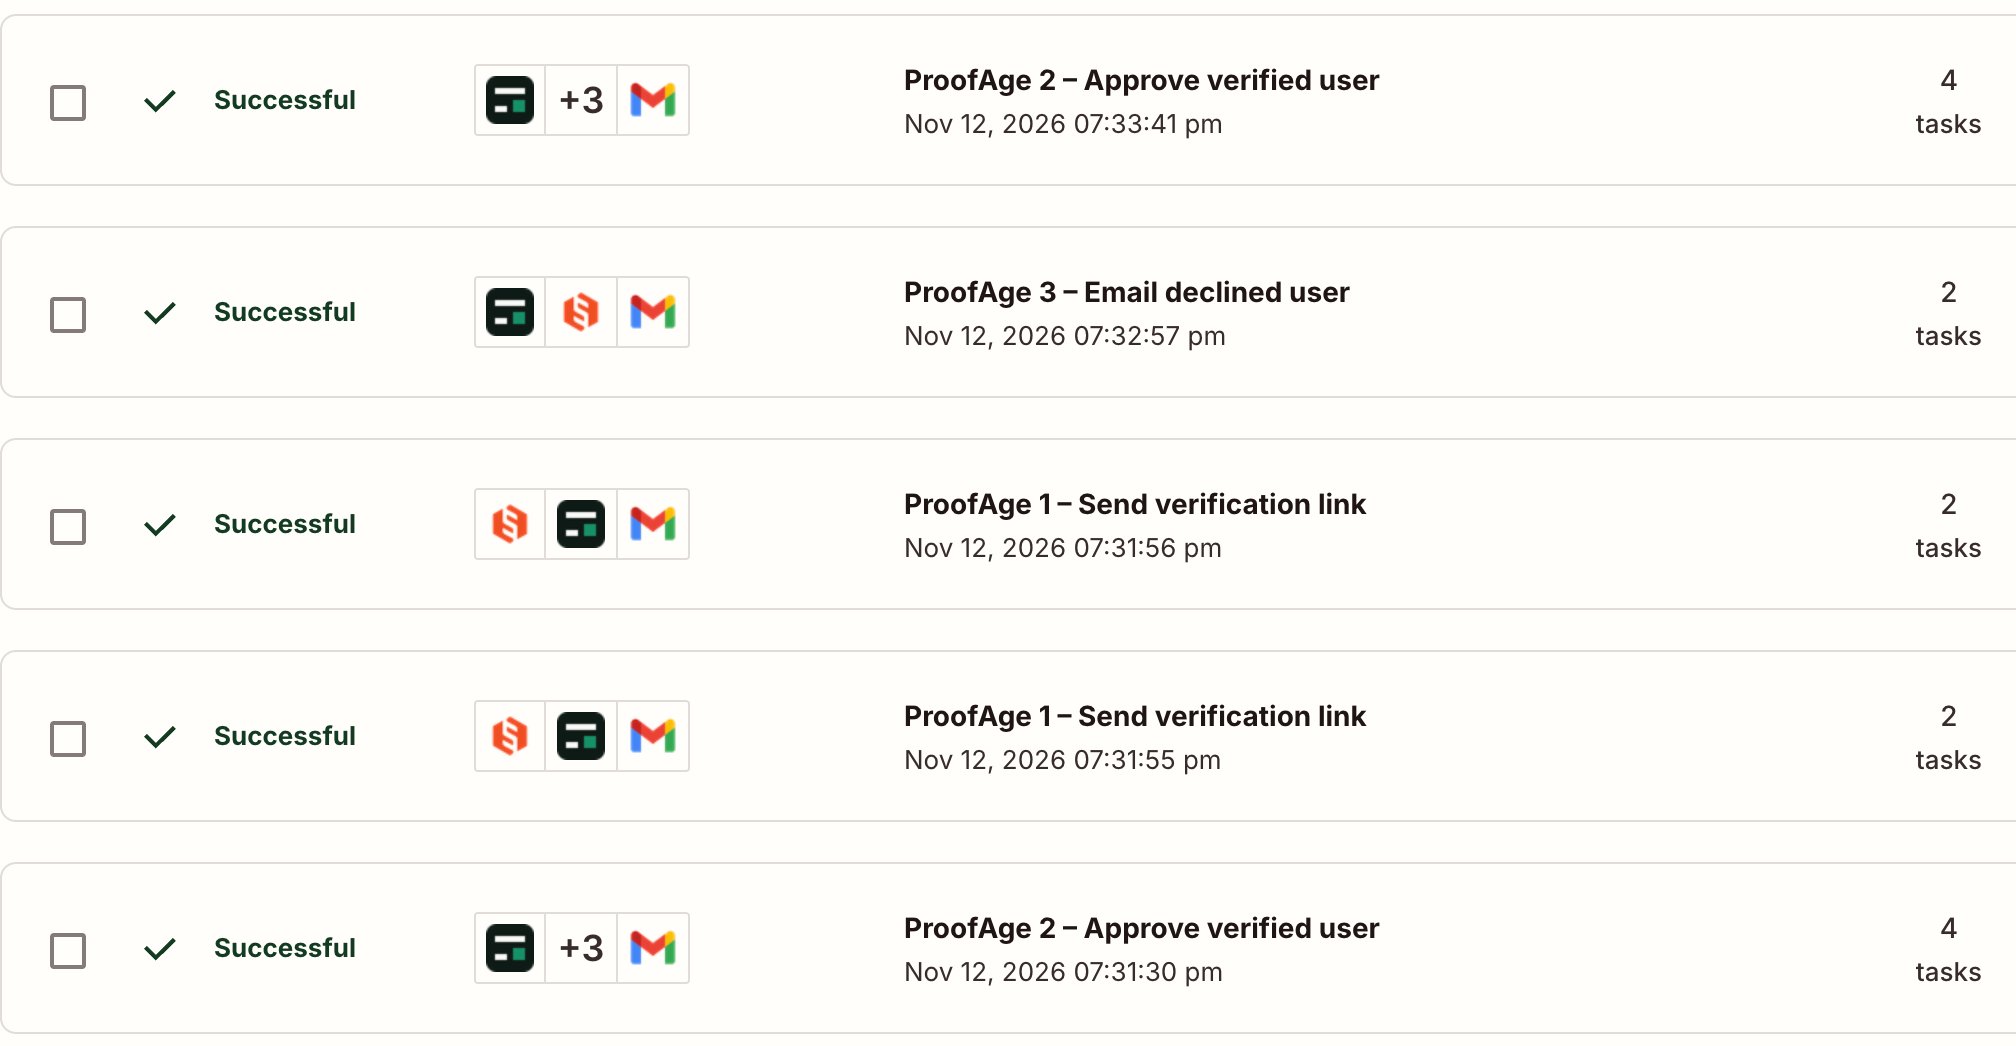
With all three Zaps on, test each case in your Test environment:
Zapier’s Zap history shows every run; the ProofAge console shows each verification and
whether its result reached Zapier.
Let a user try again
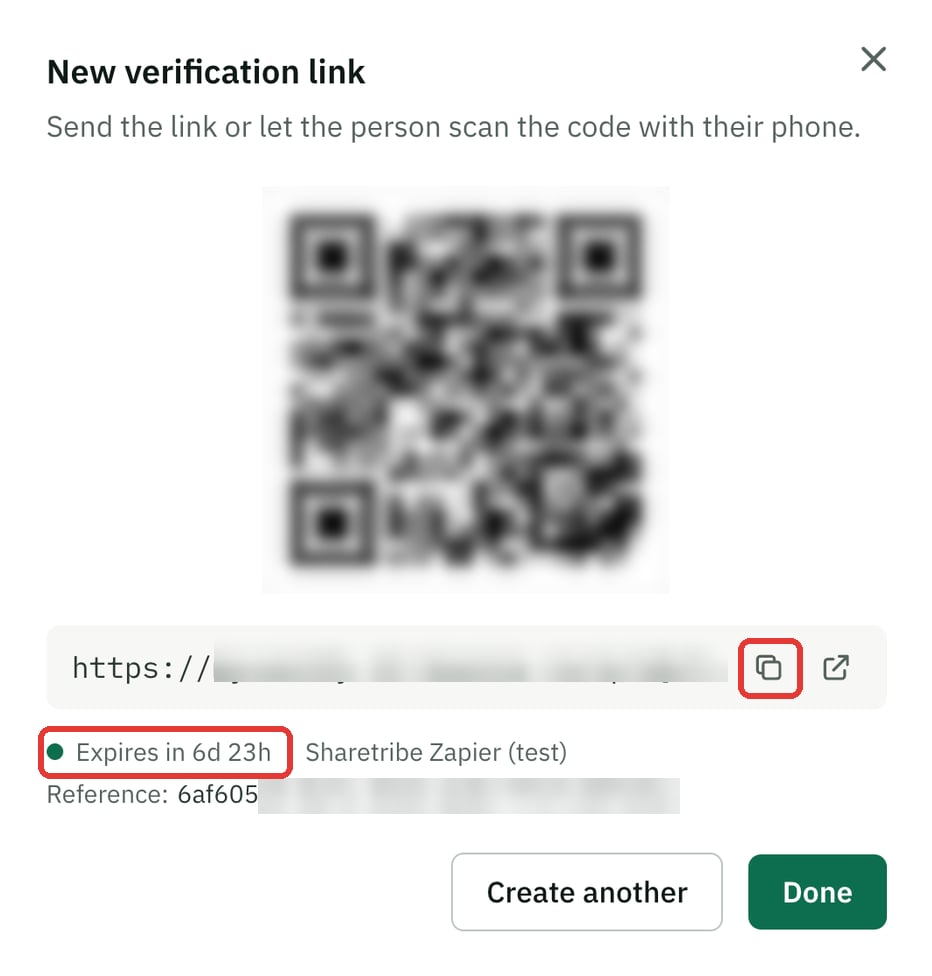
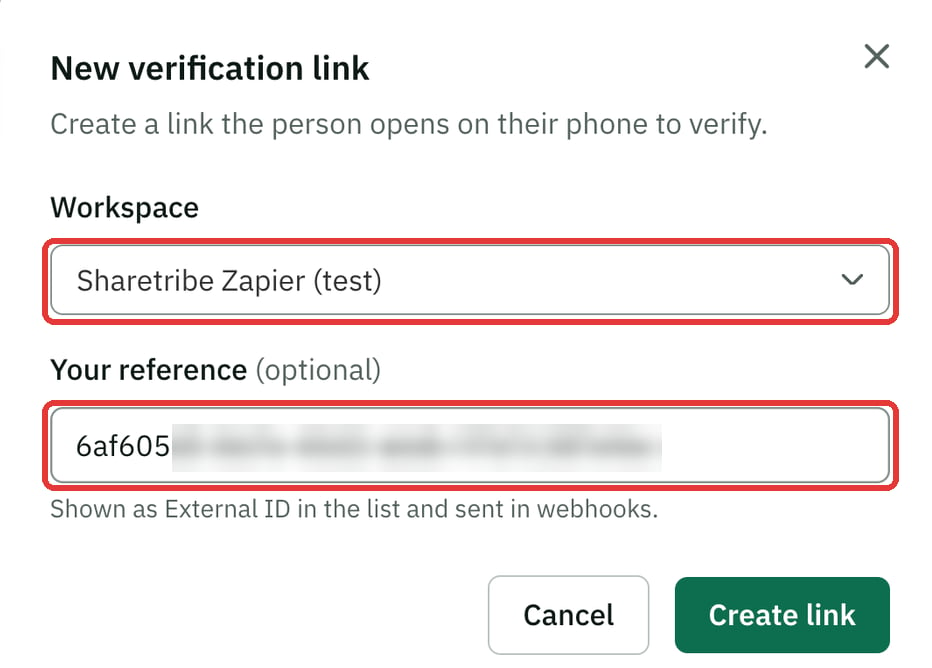
A declined verification can’t be reused. To give a user another chance:- In the ProofAge console, open Verifications and click New link.
- Under Workspace, choose the workspace your Zaps are connected to.
-
In Your reference, enter the user’s Sharetribe user ID (copy it from Sharetribe Console:
Users, click the user, User ID). This is what links the new result to the user, so it
must be exactly the user ID.
-
Click Create link. ProofAge shows the link, a QR code and how long the link is valid.
Click the copy button next to the link and send it to the user, for example in a reply to
their email.